21 September 2014

No-Bake Cheesecake Bites with a Raspberry Drizzle, Part II

Yesterday I shared how to make some scrumptious no bake cheesecake bites. Now it's time for the sauce (and the redemption of some raspberries).

It is unbelievably simple. And it totally did the trick! My raspberries went from being too tart to tolerate, to tasting like a raspberry should: sweet with a hint of sour. This raspberry sauce elevates the plain cheesecake bite to a whole new level.

And while I'm working with raspberries, feel free to use whatever fruit you have on hand (or just want to try). The possibilities are endless!

All you'll need is --
· 1/2 cup sugar
· 1/4 cup water
· 12 oz. raspberries

Place sugar and water in a small saucepan over high heat. Stir, and bring to a boil. Reduce the heat, and simmer until the sugar is dissolved. Remove from heat and allow to cool completely. (Basically you are making a simple syrup, but instead of equal parts sugar and water, you are doubling the sugar. Perfect for "too-sour" raspberries!)

Once the syrup is cooled completely, place it and the raspberries in a blender and puree until smooth.

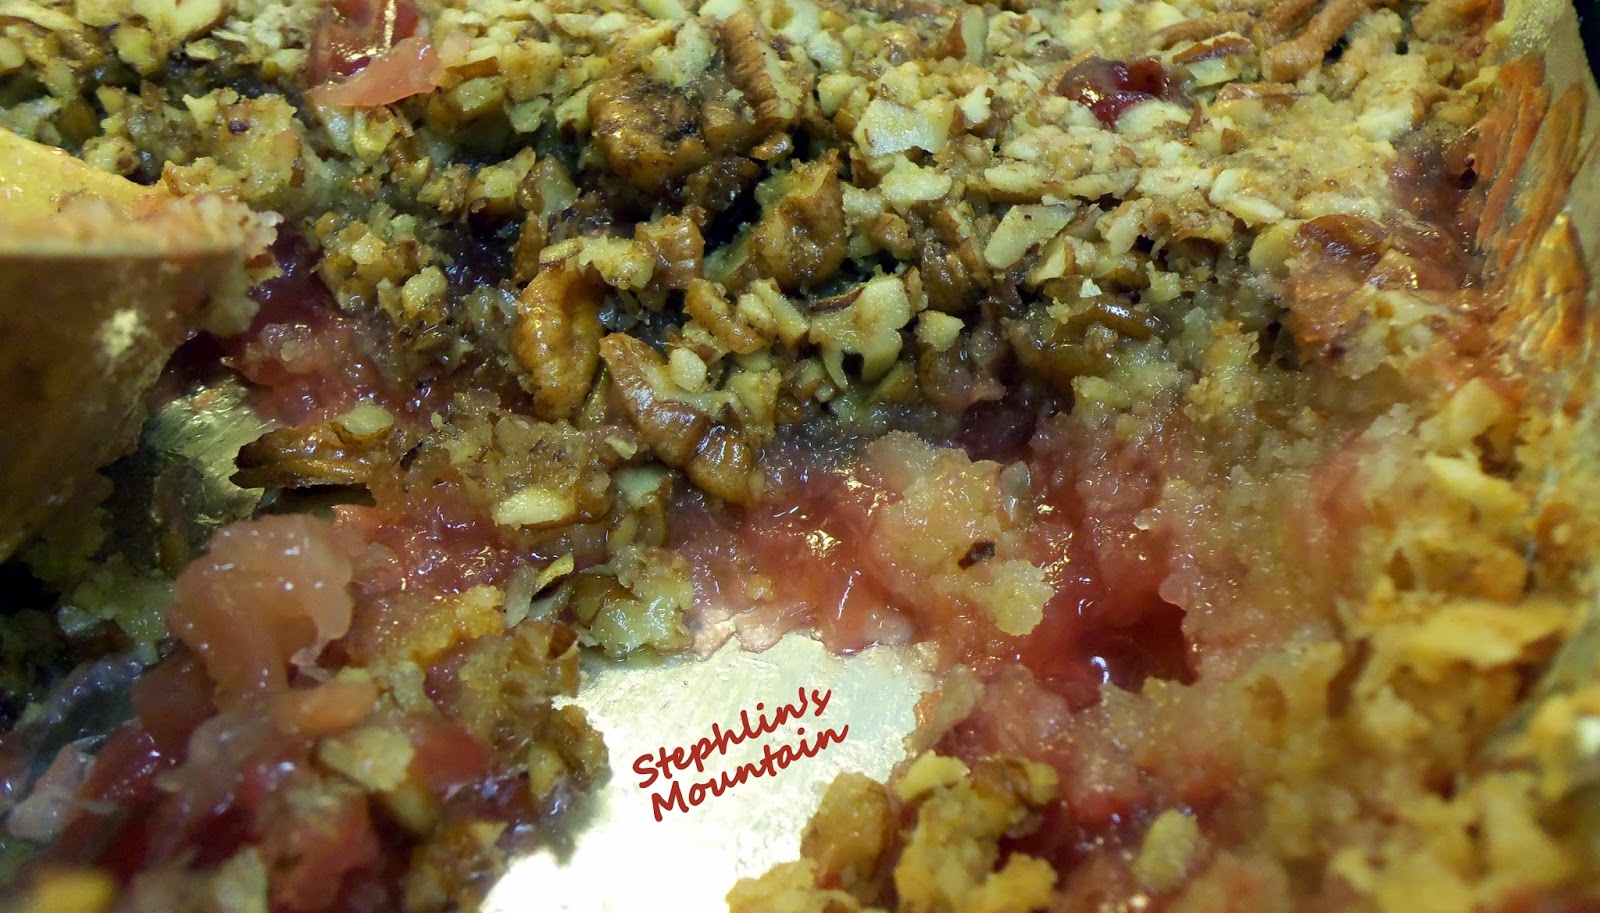
To separate the seeds from the sauce, you would ideally use a chinois or conical strainer. Any fine sieve should work, though. I even made do with an old flour sifter, as you can see here:


You'll notice there are still a few seeds floating around in the final product, but that little "imperfection" did not diminish the deliciousness one bit!


Stored in an airtight container in the refrigerator, this raspberry sauce should keep up to five days. Now go drizzle some over your cheesecake bites! (Or dip your cheesecake bites in some sauce, whichever you prefer.)


Recipe Credit.

Shared at Nifty Thrifty Sunday, Simple Life Sunday, and some of these fine hops.


Disclosure: This post contains an affiliate link, which means I may receive a very small commission if you click the link and buy something. This helps support my mountain homestead dream as well as my blogging activities, and the price you pay will be no different than if you arrived at the same destination through any other link. My opinions are my own, to be sure. If I link to a product and say I like it -- I truly like it! :-) Thanks for reading and following Stephlin's Mountain.

11 September 2014

Vanilla Spiced Zucchini Batter Bread

Tonight's dinner is corn and poblano lasagna. Zucchini is a required ingredient, so before B got in the kitchen to tackle the prep for our evening meal, I snuck in and used what he didn't need to make some bread!

Before I share the recipe for this yumminess, may I ask you a question? Is the term "batter bread" redundant in the instance of the title of this post?

Maybe it's because I bake for a living, or maybe it's because I'm weird (I'll cop to either), but I always differentiate between a batter bread -- or quick bread, if you prefer -- and a traditional dough bread (with yeast).

B comes in the kitchen to ask what I'm making. My reply is, "Zucchini batter bread." He proceeds to tell me saying batter bread is unnecessary. Everyone knows zucchini bread is made with a batter. "Like banana nut bread," he says. I'm quite sure I responded with a you-have-no-idea-what-you're-talking-about look. But I simply stated, "Well, OK. But don't expect me to change how I say it based on this conversation." -- Thoughts?


The base recipe I used comes from Paula Deen. I did add one ingredient. (I just adore vanilla!) And since I make my own extract, I have the pure stuff right at my fingertips. It smells divine, and I love to see the brown vanilla bean flecks in the mixture.


Doesn't that look delicious? The loaf isn't overly sweet, in my opinion. A slice of this zucchini (batter!) bread would make a nice breakfast, snack, or dessert.  Just don't forget: everything's better with a pat of butter!

Vanilla Spiced Zucchini Batter Bread

Based on Paula Deen's recipe here, scaled down to make a single loaf.

Ingredients

  • 1 1/2 + 1/8 cups all-purpose flour (or, 1 5/8 cups)
  • 3/4 tsp salt
  • 1/2 tsp ground nutmeg
  • 1 tsp baking soda
  • 1/2 tsp ground cinnamon
  • 1 1/2 cups sugar
  • 1/2 cup vegetable oil
  • 2 eggs, beaten
  • 3 tbsp water
  • 2 tsp pure vanilla extract (make your own!)
  • 1 cup grated zucchini
  • 1/2 tsp lemon juice
  • 1/2 cup chopped pecans

Instructions

  1. Preheat oven to 350 degrees.
  2. In a large bowl, combine flour, salt, nutmeg, baking soda, cinnamon, and sugar.
  3. In a separate bowl, combine vanilla, vegetable oil, eggs, water, zucchini, and lemon juice.
  4. Mix wet ingredients into dry. Fold in pecans. Pour batter into a greased standard loaf pan (I used an 8" x 3" pan).
  5. Bake 50 minutes to 1 hour, using the toothpick test to check for doneness. (Mine was done in 54 minutes.)

Yield: 1 standard loaf


Shared at All Things Thursday, Fabulously Frugal Thursday, The HomeAcre Hop, Simple Lives Thursday, Thrifty Thursday, Thriving Thursday, and some of these fine hops.


03 August 2014

The Prayer Box by Lisa Wingate: a Book Review

I just finished an inspirational read I was able to get for Free (love that!) on my Kindle Fire.  A 2014 Christy Award nominee entitled The Prayer Box.

Tandi Reese is running from a drug-filled, abusive relationship. She chooses the Outer Banks of North Carolina as a haven for her and her two children. Though she finds herself in a place she once spent time as a child, not all the memories are good ones.

Yet here she is, renting a cottage from Iola Poole, owner of the historical house and property on which the cottage sits. One day, after Iola unexpectedly passes away, Tandi finds herself cleaning out the old rickety home in exchange for rent. After a bit of snooping, Tandi finds a closet filled to the brim with boxes. Each box is filled with letters written by Iola -- letters to God.

All throughout the book, we see Tandi struggle with many emotions that are holding her back from a better life for her and her children. Feelings of abandonment, unworthiness, and the inability to trust are a few at the top of the list.

Through Iola's letters, we first learn about her past. They also provide inspiration and encouragement to Tandi while she works to build a meaningful, fulfilling life with positive relationships. Of course, along the way, Tandi realizes she is not really alone -- God's grace is all around her.

I rarely highlight passages in books, but found myself doing so in this one. Here are a few I wanted to remember and share.
Nothing that had happened since I'd been on this island had happened at random. I'd been given shelter for my family, food to eat, work to do.

Given.

Gifts. I'd wanted to earn my own way, to do this myself, to form a new life on my own, but instead, this had been given to me. This life. This place. These letters.

This revelation.

Prayers are answered in ways we don't choose. The river of grace bubbles up in unexpected places.
(Another!)
Thank you. I wanted to write it on paper and fold it up in a box to remind myself, the next time I couldn't see anything but mountains ahead, that where there's a mountain, there's always a river flowing nearby.

Ultimately the river is the more powerful of the two.
(One more!)
All my life, I'd let the ties of blood control me, limit me, define me, yet I'd ignored the ties of love. I'd shielded myself from the people who tried to slip inside the armor, who told me that I was worthy.
The Prayer Box by Lisa Wingate -- highly recommended!

Shared at Simple Life Sunday, Simple Saturdays Blog Hop, Simply Natural Saturdays, and some of these other fine hops.

I was featured!
Trayer Wilderness


Disclosure: This post contains affiliate links, which means I may receive a very small commission if you click the link and buy something. This helps support my mountain homestead dream as well as my blogging activities, and the price you pay will be no different than if you arrived at the same destination through any other link. My opinions are my own, to be sure. If I link to a product and say I like it -- I truly like it! :-) Thanks for reading and following Stephlin's Mountain.

26 July 2014

Cinnamon Bread. Quick and Simple.

I love quick breads. Mix the batter, pour it in a pan, pop it in the oven to bake. That's it. No long, drawn out process required.

A while back I had a craving for cinnamon bread. I was thinking of a traditional loaf with yeast and all, but was too lazy to go through the motions necessary for my desired result. Ever been there? Yep. Me, too. Quick bread to the rescue!

I found a recipe to try at Allrecipes.com, gave it a go, and was happy I did. It's not the prettiest loaf I've ever seen, but it sure is yummy. There's a nice sweet crust on top, and the cinnamon flavor can be tasted throughout. Since the "swirl" technique is used, I wasn't sure that would be achieved -- glad I was wrong. Craving fulfilled.

Want another peek?


Go ahead.  Get your drool on.  I won't tell.


OK.  You've been (fairly) patient.  Recipe after one more.


Simple Cinnamon Quick Bread

Submitted to Allrecipes.com by bettina.

Original recipe advises to wrap finished (and cooled) loaf in foil and let sit overnight before slicing. I totally did not do this. (Who could wait? I had a craving, remember?) But I'm quite sure the slices would have looked prettier had I followed this direction. :-)

Ingredients

  • 1/3 cup + 1 cup granulated white sugar
  • 2 tsp ground cinnamon
  • 2 cups all-purpose flour
  • 1 tbsp baking powder
  • 1/2 tsp salt
  • 1 egg, beaten
  • 1 cup milk
  • 1/3 cup vegetable oil

Instructions

  1. Preheat oven to 350 and lightly grease a 9"x5" loaf pan.
  2. Mix together 1/3 cup sugar and 2 tsp cinnamon in a small bowl. Set aside.
  3. In a large bowl, combine flour, baking powder, salt, and remaining 1 cup sugar. In another bowl, combine egg, milk, and oil. Add wet ingredients to dry. Stir until moistened.
  4. Pour half the batter into prepared pan. Sprinkle with 1/2 cinnamon and sugar mixture. Repeat with remaining batter and cinnamon / sugar. Run a knife through the batter to swirl all together.
  5. Bake for 45 - 50 minutes. Use the toothpick test to ensure doneness. Let cool in pan 10 minutes before removing to a wire rack to cool completely.

Yield: (1) 9"x5" loaf


Shared at Simple Saturdays, Simply Natural Saturdays, and some of these other fine hops.


24 July 2014

How to Make and Store Your Own Dried Orange Zest

Have I ever told you about my love for my dehydrator? (Heh, Heh, of course I have.) Well here's yet another task it can handle for you!

How to Make and Store Dried Orange Zest

The zest of an orange is the outermost, colorful part of the peel. It contains concentrated, highly flavorful oils great for baking delicious sweets and breads. You can most certainly use it in savory cooking, as well.


All you need to do to make zest is remove this colorful part from the orange. You can do this by using a knife to cut strips, a simple grater, or a utensil more specifically designed for zesting. (I have a Microplane and wouldn't trade it for the world.) The important thing to remember is not to go into the pith, or white part of the peel. This has an unappealing flavor. Also, don't forget to wash your fruit before zesting.

If you're lucky and find yourself with a lot of oranges, making a large quantity of dried zest is made easier by using a food dehydrator. (I have a dwarf orange tree right outside on the patio. It's producing intoxicatingly fragrant blooms and fruit -- I'm impatiently waiting for those babies to ripen.)


Additional note: I also watch for oranges (or lemons or limes -- you can zest them too, ya know) in the reduced section of my produce department. I can sometimes find 3 lb. bags of oranges for 99¢!

To dry your zest, simply spread it out on a shelf of the dehydrator and set your temperature to 135°. Walk away and let it do its thing until the zest is completely dry. Alternately, you can use your oven if the temperature can be controlled to that low degree, and you have the time. You can also simply let the zest air dry on your counter top (I have no idea how long that would take, though).

BTW, if you end up with too many oranges to eat, run them through a juicer (this is mine). That's what I do. I then freeze the juice in these little stackable Ball freezer containers and pull one out to place in the refrigerator each night before I go to bed. Freshly squeezed juice is ready to drink in the morning.

Your fresh-dried orange zest can simply be stored in a jar with a tight lid in your pantry. I can't say exactly how long it will last. I can say I've had some in my pantry for a few months, and it still has flavor.

How much does it make / save? I got about an ounce out of three large oranges. I've seen this amount go for $3 - $4 in stores...made mine for pennies!

Shared at All Things Thursday, Fabulously Frugal Thursday, Thrifty Thursday, and some of these other fine hops.


I was featured!


Disclosure: This post contains affiliate links, which means I may receive a very small commission if you click the link and buy something. This helps support my mountain homestead dream as well as my blogging activities, and the price you pay will be no different than if you arrived at the same destination through any other link. My opinions are my own, to be sure. If I link to a product and say I like it -- I truly like it! :-) Thanks for reading and following Stephlin's Mountain.

14 July 2014

Make Your Own (Ragin?) Cajun Spice!

I like rice, and I like spice. So much so, I'll say it thrice. (Sorry. I'll stop now.) Anyway, one of my favorite dishes is dirty rice. In my "cook-from-a-box" life, I loved to fix Zatarains. I'd fix it midday and eat it for lunch and dinner. Yum. So, as you might imagine, I've been looking for a homemade dirty rice recipe to try. Many I've come across are quite involved -- not interested in those. Then I found Alecia's Easy Dirty Rice recipe at Detours in Life (more on that total meal tomorrow).

One of the ingredients called for in the recipe is Creole seasoning. I know that can be bought at the grocery store, but I didn't have any on hand so I went looking for a homemade version. I soon found the terms Creole and Cajun were often used interchangeably. I made a feeble attempt to search for a true difference between the two, and basically came up empty. I'm sure folks from each camp can rattle off the difference, but I'm not going to try here.

I ended up mashing up recipes I found, and came up with the following concoction. Next time I might add some garlic powder, but was shockingly out this time. Even as is, I liked it very much.


Cajun Seasoning

The more red pepper flakes you add, the more "ragin" this Cajun seasoning becomes!

Ingredients

  • 1 to 1 1/2 tbsp kosher salt
  • 1 1/2 tsp paprika
  • 1 tsp ground cayenne pepper
  • 1 1/2 tsp ground black pepper
  • 1 1/2 tsp dried oregano
  • 1 tsp onion powder (make your own!)
  • 1/2 tsp red pepper flakes

Instructions

  1. Mix all ingredients together in a jar. Can be stored in a cabinet for months.
  2. Note: You can use a spice grinder if you want everything to be the same size and consistency (ground). I didn't mind the non-ground bits.

Yield: abt 4 tbsp (or, abt 2 oz)

Shared at Homemade Mondays, Homestead Barn Hop, the Monday Funday Party, Natural Living Monday, and some of these other fine hops.


Disclosure: This post contains affiliate links, which means I may receive a very small commission if you click the link and buy something. This helps support my mountain homestead dream as well as my blogging activities, and the price you pay will be no different than if you arrived at the same destination through any other link. My opinions are my own, to be sure. If I link to a product and say I like it -- I truly like it! :-) Thanks for reading and following Stephlin's Mountain.

29 June 2014

Canning Cherries is a Cinch!

I adore cherries. They are sometimes called "nature's candy" (the sweet ones anyway), and they are scrumptious. But there's only a short window (about this time every year) that fresh cherries are available at a reasonable price. You might even be able to get them for a great price. My local store was having a four day sale, and sweet cherries that are regularly $6.99 per pound were going for $2.99 per pound. That's probably very close to the best price I'll see during the window, then it will be gone until next year.

I grabbed up six pounds of sweet cherries, and started the preservation process this morning. I plan to eat some straight from the bag (highly recommended), use some in a brownie recipe, make some freezer jam, dehydrate some, and can some. Today was canning day.

After washing the cherries and removing the stems, I set to pitting. This is the only part I don't like, but it's not difficult. If you have a cherry pitter, it's a breeze. But I don't have one. Still, as I said, it's not that difficult without one. I just use a small star cake decorating tip. You know the kind that go in icing bags? Just place the end of the cherry where the stem was over the top of the tip and press down. The cherry will separate and the pit will be pushed through.


It only took me about 45 minutes to pit all six pounds of cherries. And since I only do this once a year, I'm sure to be slow!

Incidentally, since a cherry pitter is something I probably wouldn't buy myself, and since Christmas is only six months away, if any family member out there is looking for an idea for something I might want to open in December...take a look at this.

Now on to the actual canning bit! Cherries can be preserved with the waterbath canning process. The absolute easiest way is to pack as many into a jar as will fit with a 1/2 inch headspace. Then pour boiling water over the cherries, also minding the headspace. Apply lid and ring, and process in a boiling water bath for 20 minutes.

If you want to add a sweetener, feel free. I pack my cherries in a light syrup. My goal is to have them as close to fresh as possible, since I don't always know what I'm going to be doing with them in the future. I just use a water / sugar ratio of 4 to 1. Today, for example, I combined 8 cups of water and 2 cups of sugar. Brought it to a boil, and poured it over my jarred cherries. And since I love the combination of cherry and vanilla, I added a teaspoon of pure vanilla extract to each of the jars.


Nothing could be simpler!  Six pounds of cherries with the 8 cup water / 2 cup sugar simple syrup gave me 8 pints of canned cherries.

There are other slight variations that can be made, as well. You can actually can cherries without pitting them. I've never done this, but I read you just need to poke the cherries with a pin so they won't burst. Also, if your are wanting softer cherries, cook them in the simple syrup of your choice for five minutes. Then ladle cherries and syrup into your canning jars for process.

Shared at Nifty Thrifty Sunday and some of these other fine hops.


Shop Ball and Kerr Products


Disclosure: This post contains affiliate links, which means I may receive a very small commission if you click the link and buy something. This helps support my mountain homestead dream as well as my blogging activities, and the price you pay will be no different than if you arrived at the same destination through any other link. My opinions are my own, to be sure. If I link to a product and say I like it -- I truly like it! :-) Thanks for reading and following Stephlin's Mountain.

26 June 2014

Delectable Dump Cake (Is it a Southern Thing?)

I don't know why, but I equate Dump Cake with the South. So imagine my shock and surprise when I discovered my southern born B had never heard of it, let alone tasted it.

I'm not quite sure what brought on the recent desire for Dump Cake to begin with. I remember reading a post about it online, then a few days later it was mentioned in my vicinity off-line. I guess I took that as a sign from above. Must. Make. Dump. Cake.

Dump cake also brings back memories.  Grandma Logue used to make it for us, and I bet it had been twenty years or more since my last bite.


Dump Cake as it is traditionally prepared, unfortunately, is not good for you. Don't worry, I didn't let that tidbit stop me. Yet I was feeling extra bummed about "dumping" a box of chemical-laden cake mix on top of my canned fruit. So I searched around for a recipe, and made my own. There! Now I feel a little better. (I really wanted to make my own cherry pie filling, but I just couldn't bring myself to pay the price for fresh cherries. I know they're going to be on sale soon, so I've put canning some for next time on my to-do list!)


The topping also includes a couple of cups of chopped pecans. I was able to use my chopping gadget to make quick work of some pecan halves my grandmother gave us. In fact, she's been supplying us with pecans for years.

I remember, when I was a kid, having to go to the tree in her backyard and pick them up off the ground. And I remember her and Grandpa sitting in the living room with a bowl full each, cracking them open.


Ready for the recipe, yet? Don't worry. I won't leave you hanging in suspense much longer.  ;-)


Delectable Dump Cake

Delectable Dump Cake

Ingredients

  • 1 (21 oz.) can cherry pie filling
  • 1 (20 oz.) can crushed pineapple, with juice
  • 2 full cups homemade yellow cake mix (or 1 box store bought)
  • 2 sticks unsalted butter, melted
  • 1 tbsp pure vanilla extract (make your own!)
  • 2 cups chopped pecans

Instructions

  1. Preheat oven to 350 degrees. Coat 9x13 pan with non-stick spray.
  2. Dump pineapple and cherry pie filling into pan. Swirl together and spread evenly over bottom of pan.
  3. Dump and spread yellow cake mix evenly over top of fruit.
  4. Dump and spread chopped pecans evenly over top of cake mix.
  5. Mix vanilla in with melted butter, and pour evenly over top of pecans.
  6. Bake for 45 minutes to 1 hour. (Mine took 55 minutes.)

Shared at All Things Thursday, Fabulously Frugal Thursday, Four Seasons Blog Hop, Thrifty Thursday, Thriving Thursday, and some of these other fine hops.


I was Featured!

25 June 2014

Make Your Own Cake Mix in a Box

Mine ended up being cake mix in a freezer bag, but I digress.

All I wanted to do was make a Dump Cake. In my ever constant (never ending?) attempt to eat more real food and less chemicals, I was a bit frustrated with the "dump a box of cake mix over the top" step in the recipe. Of course, that's not the only recipe like that. There are plenty that include "1 box yellow cake mix" as a single ingredient.

So off to Google I go. While I eventually found the recipe that follows on several blogs, I will credit the first place I saw it -- Brown Eyed Baker. Thankfully, I can now add boxed cake mix to my no-need-to-buy list!

Per the instructions, I used my trusty food processor to easily whip the mix together.

Mixed dry ingredients.

Cubed butter tossed in flour mixture, and pure vanilla extract added.

DONE!

Here's the recipe. I'll be back later tomorrow with that Dump Cake!

Make Your Own Cake Mix

First seen on Brown Eyed Baker.

For a cake recipe using this mix, visit Mel's Kitchen Cafe.

Ingredients

  • 2 cups sugar
  • 1 1/2 cups all-purpose flour
  • 1 1/2 cups cake flour
  • 1/2 cup milk powder
  • 1 tbsp baking powder
  • 1 tsp salt
  • 2 sticks unsalted butter, cut into 1/2 in. cubes, chilled
  • 1 tsp pure vanilla extract

Instructions

  1. Add all dry ingredients to bowl of food processor. Mix for about 15 seconds.
  2. Add butter cubes and slightly toss in flour mixture, making sure all are coated. Add vanilla.
  3. Process with 10-15 one-second pulses, until mixture is fine and crumbly -- like boxed cake mix!
  4. Store in freezer bag or container in freezer for up to 2 months. No need to "thaw". Simply use straight from freezer in any recipe calling for cake mix.

Yield: 5+ cups


Shared at Life Lately Link Up, Homemaking Party, Wake Up Wednesday, Backyard Farming Connection Hop, Lovely Ladies Linky, Mountain Woman Rendezvous, Wonderful Wednesday Blog Hop, and some of these fine hops.


Disclosure: This post contains affiliate links, which means I may receive a very small commission if you click the link and buy something. This helps support my mountain homestead dream as well as my blogging activities, and the price you pay will be no different than if you arrived at the same destination through any other link. My opinions are my own, to be sure. If I link to a product and say I like it -- I truly like it! :-) Thanks for reading and following Stephlin's Mountain.

19 June 2014

All Things New by Lynn Austin: a Book Review

I think I've found a new favorite author. Seriously!

First, let me give a shout out to Amazon and my local library. They work together and allow me to borrow digital books and download them to my Kindle Fire -- a free service provided to me as a library patron. I found Lynn Austin's book All Things New by browsing the Georgia Download Destination.

While I thoroughly enjoy historical fiction and women as lead characters, I don't often enjoy Christian fiction. To be fair, it's likely due to my limited exposure to the genre. In my experience, however, there is a bit too much "sugar coated-ness" for my taste. I firmly believe God performs miracles on a daily basis. Yet, I also believe the events leading up to those miracles are not always pretty.

No danger of sugar-coating in this book! Ms. Austin was able to portray a tumultuous time in (Southern) American history with accuracy, but without overly graphic or crass language.

All Things New is primarily set on the White Oak plantation not far from Richmond, Virginia. The time period is Reconstruction, immediately following the Civil War. The story has three main characters: a mother and her daughter (with a Southern aristocratic social standing), and a newly freed female slave. Each chapter is told from a different character's viewpoint.

The mother (Eugenia) wants nothing more than for her life to return to the "way things were" before the war. She has no intention of changing her beliefs regarding slavery or those enslaved. The daughter (Josephine) is eager to embrace change, not only in terms of the abolishment of slavery, but also in the roles women generally play in Southern society. The newly freed female slave (Lizzie) is just plain terrified. She wants to move forward and have a better life for herself and her children, yet she trusts no one outside her family. Her bravery is noted in the small steps she takes toward that better life, risking her personal safety in the process.

Each of these characters also struggle with their relationship with God, specifically their trust in Him.

The ravages of war, gender roles, class roles, suicidal tendencies, forbidden love, violence against a race of people, and trying to figure out whether God even plays a role in it all -- in 400+ pages. Great read by Lynn Austin!

Shared at All Things Thursday, Fabulously Frugal Thursday, The HomeAcre Hop, Simple Lives Thursday, Thrifty Thursday, Thriving Thursday, and some of these other fine hops.


Disclosure: This post contains affiliate links, which means I may receive a very small commission if you click the link and buy something. This helps support my mountain homestead dream as well as my blogging activities, and the price you pay will be no different than if you arrived at the same destination through any other link. My opinions are my own, to be sure. If I link to a product and say I like it -- I truly like it! :-) Thanks for reading and following Stephlin's Mountain.

18 June 2014

Fudgy Blueberry Brownies (and Martha Stewart Helped!)

I have a confession to make. Prior to yesterday, I had never made "real" brownies. You know, the kind that do not come from a box. Please don't ask what took me so long. I'm ashamed and have no answer.

One of the things I'm most pleased about since I have been slowly transitioning to real food, is the amount of actual ingredients I now keep in my pantry.  I no longer open the door to a bunch of pre-packaged box dinners made with Lord-only-knows-what.  It's quite exciting for me.

So you know why I was tickled pink (blue?) when I came across Amanda's recipe for Blueberry Brownies at i am baker. Blueberries, butter, chocolate chips, sugar, eggs, vanilla, cocoa powder, flour, and kosher salt -- check!

The recipe is extraordinarily easy. So much so that I promise to never make brownies from a box again. Seriously. Ne-ver.

And the blueberries? Oh. My. Imagine taking a bite of fudginess, followed by a literal burst of berry flavor. Yep.

Another gadget that made these brownies super simple is Martha Stewart's Brownie Slice Pan*. The chances of me ever purchasing one for myself would have probably been slim to none (think "who needs that?"). However, it was a gift from my loving mother. And now that I have used one, I adore it!

It reminds me of a shallow square springform pan, the difference being you lift the product out of the pan instead of "springing" the pan off the product. Get me?

The pre-sliced sectional is a bonus; inserting it is not required.  One of the suggestions from the box is using it with rice krispie treats, and I do think the pre-slice thingamajig would be great with those.


*Note on product link above: First, it's an affiliate link (see disclaimer below). More importantly, this links to the "Chicago Metallic" pan. I assure you it is the same pan that came in the Martha Stewart box I have. My pan even has "Chicago Metallic" imprinted on it. Feel free to look at the "Martha Stewart" version here. As of this moment, it appears to cost about $2.50 more for her name.

Shared at The Homemaking Party, Lovely Ladies Linky, Mountain Woman Rendezvous, Wake Up Wednesday, Wonderful Wednesday, and some of these other fine hops.


Disclosure: This post contains affiliate links, which means I may receive a very small commission if you click the link and buy something. This helps support my mountain homestead dream as well as my blogging activities, and the price you pay will be no different than if you arrived at the same destination through any other link. My opinions are my own, to be sure. If I link to a product and say I like it -- I truly like it! :-) Thanks for reading and following Stephlin's Mountain.

Related Posts Plugin for WordPress, Blogger...