23 July 2016

Homemade Chocolate Syrup and What it Means to Rest in the Lord

100_7969Have you seen those "chocolate milk is good for you" commercials? I'm not going to expend any brain power trying to dispute whatever science is being used to back up that claim.  Just.  C'mon, people.

But no matter what my brain says, I love chocolate milk.  Love. It.  The sweet chocolatey goodness was rarely in our house growing up, so even at age 43 I still consider it a treat.

Chocolate milk isn't cheap.  I had a relatively inexpensive, go-to brand where I used to live.  And even then I would try to only buy it when on sale.  Since moving, I haven't been able to find anything comparable.

So I was forced to make my own (the chocolate part, that is).  Putting together just a few quality ingredients will give you a darn tasty chocolate syrup to add to your milk for a treat.

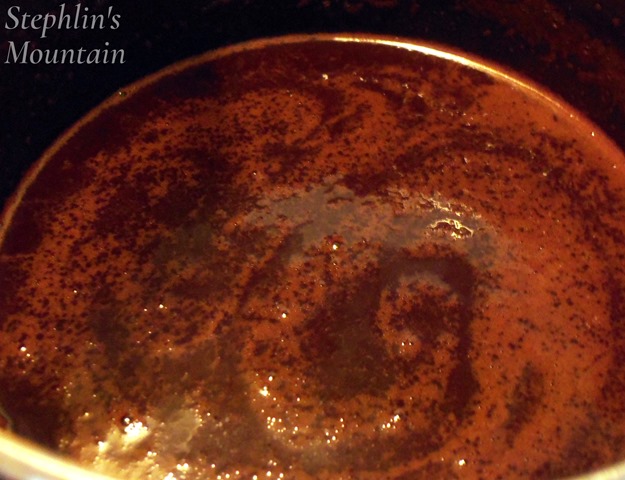
Cocoa, water, and sugar boiled together for a few minutes.  That's all it takes.  But watch your pot! Boiling over is a real possibility.

100_4988

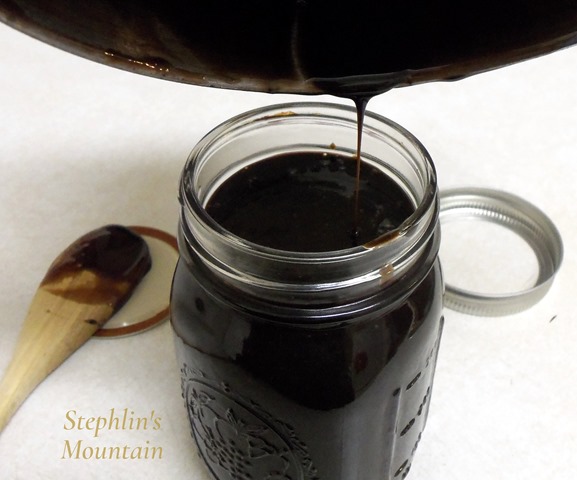
Allow it to cool, and store it in the fridge.  I use a pint size mason jar with a screw cap.

100_7965

Before I give you the specific recipe, I'd like to share a passage from the devotional I read this morning.  (If you're not interested, simply scroll down until you see the bold Homemade Chocolate Syrup, but it really is just a quick passage that made me think.)

100_4990

To "rest in the Lord" is the perfection of inward activity.  In the ordinary reasoning of man it means sitting with folded arms and letting God do everything; in reality it is being so absolutely stayed on God that we are free to do the active work of men without fuss.  The times God works most wonderfully are the times we never think about it.  [Oswald Chambers:  If Thou Wilt Be Perfect]

100_4991

Here's the recipe! I got it from Dining on a Dime, which cited The Tightwad Gazette.

Homemade Chocolate Syrup

100_7961Ingredients

  • 1/2 cup cocoa, packed
  • 1 cup water
  • 2 cups sugar
  • 1/8 tsp salt
  • 1/4 tsp vanilla (optional, in my opinion)

Instructions

  1. Mix cocoa and water in a saucepan. Heat and stir to dissolve the cocoa.
  2. Add the sugar and stir to dissolve.
  3. Boil 3 minutes. (Watch your pot!)
  4. Remove from heat. Stir in salt and vanilla.
  5. Store in refrigerator. It will supposedly keep several months, but mine is always consumed well before then. :-)

Yield: 2 cups

Shared at Simple Saturdays, Happiness is Homemade, Tasty Tuesdays, Tuesdays with a Twist.

Disclosure: This post contains affiliate links, which means I may receive a very small commission if you click a link and buy something. This helps pay for the RV, supports our mountain homestead dream of owning land, as well as my blogging activities, and makes the dogs happy.  Hopefully, the purchase benefits you, too!  The price you pay will be no different than if you arrived at the same destination through any other link. My opinions are my own, to be sure. If I link to a product and say I like it -- I truly like it! Thanks for reading, following, and supporting Stephlin's Mountain.

From my restful space to yours!

15 July 2016

Use Peppermint Essential Oil to Relieve Allergy Symptoms

100_7957I am a firm believer in essential oils and aromatherapy.  And peppermint essential oil is one of my favorites.  I diffuse it to promote alertness and clarity.  I use it in my homemade bug spray, and I swish it daily with my homemade mouthwash.

I've also read peppermint essential oil (links to where I get mine) is great for dealing with nausea or other digestive troubles.  Thankfully, I don't often have problems in that area.

Other generalized areas that one might find relief from with the use of peppermint essential oil is stress, headache, and eye strain.

And I can now personally attest to the notion that peppermint essential oil works in relieving allergy symptoms.

Something I haven't had to deal with much in the past is allergies.  But this year has been different.

Maybe it's because I'm another year older.  I've been told more than once allergies get worse with age.  Or maybe it's because I recently moved, and am now exposed to different types of pollen.  Or maybe it's because the woods are right outside my door – closer than they have ever been.

(Not kidding.  Here's a view of my warmer / diffuser sitting on a small table in front of my picture window…and the woods not far behind.)

100_7952

I don't know for sure why I am suffering more this year from allergy symptoms.  But the watery, grit filled eyes, the sometimes runny nose, and the scratchy throat with a slight headache are real.

I read a short article by Josh Axe at Rodale's Organic Life called 3 Essential Oils that Can Ease Your Allergies.  This quote is what prompted me to try diffusing peppermint essential oil to help with my allergy symptoms:

"For adults, inhaling diffused peppermint oil can immediately unclog the sinuses and offer relief to scratchy throats."

So I did just that.  And it worked.  My eyes felt clear, and my sinuses were unclogged.  My throat was not scratchy, and I had no headache.  This all with the diffuser approximately twelve feet away.

I can see the diffusing of peppermint essential oil becoming a regular occurrence in my home as long as I'm dealing with these allergy symptoms! If you suffer, too, you might want to give it a try.

Shared at From the Farm, Happiness is Homemade, and Simple Saturdays.

Obligatory disclaimers:  (1) I am not a doctor, and statements here have not been evaluated -- nor approved -- by the FDA. This post is meant for educational and informational purposes only. Please conduct your own research and make your own decisions regarding the use of essential oils.  (2) This post contains affiliate links, which means I may receive a very small commission if you click a link and buy something. This helps pay for the RV, supports our mountain homestead dream of owning land, as well as my blogging activities, and makes the dogs happy.  Hopefully, the purchase benefits you, too! The price you pay will be no different than if you arrived at the same destination through any other link. My opinions are my own, to be sure. If I link to a product and say I like it -- I truly like it! Thanks for reading, following, and supporting Stephlin's Mountain.

From my pollen-filled mountaintop to yours!

14 July 2016

Blueberry Chocolate Chip Drop Biscuits

100_7947I'm not a big fan of biscuits.

I know, I know.  How very un-Southern of me.

But it's true.  Now, I'm not saying I never eat them.  I can quite adequately tear down some biscuits slathered with an inch of sausage gravy.  Who couldn't?

And actually, that illustrates my point about my relationship with biscuits.  I usually find them to be dry.  Very dry.

Then I tried these biscuits – these easy, mix 'em up in one bowl, drop biscuits. Not dry at all.

Blueberry Chocolate Chip Drop Biscuits and More

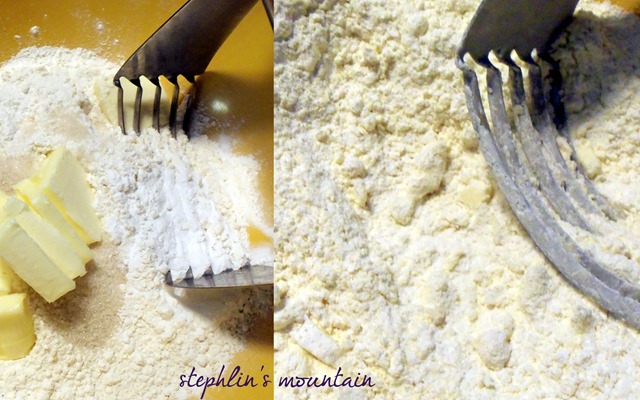
I love my pastry cutter / blender to cut butter into a dry mixture.  You can also use a fork, or your hands.

100_7945

I was gifted a gallon of fresh off the no-pesticide vine blueberries about a week ago, so adding those plump bursts of juiciness into these biscuits was a must.

100_7949

Then I threw in a few chocolate chips.  I was first introduced to the combination of chocolate and blueberry when I made some fudgy blueberry brownies a couple of years ago.  Since I was a bit blown away by the flavor, I don't think the combination gets enough attention.

Give these jewels a try.  I doubt you'll be disappointed.  If you want to kick the sweetness up a notch – and eat these babies for dessert – try drizzling some honey over them.  O. M. G.

Blueberry Chocolate Chip Drop Biscuits

100_5397Original recipe by Jennifer at Bake or Break.

Ingredients

  • 2 cups all-purpose flour
  • 2 tbsp organic cane sugar
  • 2 tsp baking powder
  • 1/2 tsp salt
  • 1/4 cup butter, softened and sliced
  • 1/2 cup sour cream
  • 1/2 cup whole milk
  • 1/2 cup fresh blueberries
  • 1/4 cup mini semi-sweet chocolate chips

Instructions

  1. Preheat oven to 375 degrees. Lightly butter a baking sheet. [Note: I baked these in a toaster oven!]
  2. Whisk together flour, sugar, baking powder, and salt. Cut in butter. A pastry blender makes it super easy. You may also use a fork or your hands.
  3. Stir in the sour cream, then stir in the milk. Fold in blueberries and mini chocolate chips, trying not to break too many blueberries.
  4. Drop dough onto prepared baking sheet. Original recipe calls for "3 tablespoons (not quite 1/4 cup)" per biscuit. I used a flatware tablespoon, heavily mounded with dough. Pretty easy to eyeball.
  5. Bake for 20 minutes then check. You're looking for a light brown color and a biscuit that is firm to the touch. Try not to over bake. My little oven didn't require more than 22 minutes.

Yield: 1 dozen

Shared at This Is How We Roll, Thrifty Thursday, From the Farm, Happiness is Homemade, Tasty Tuesdays, and Simple Saturdays.

Disclosure: This post contains affiliate links, which means I may receive a very small commission if you click a link and buy something. This helps pay for the RV, supports our mountain homestead dream of owning land, as well as my blogging activities, and makes the dogs happy.  Hopefully, the purchase benefits you, too!  The price you pay will be no different than if you arrived at the same destination through any other link. My opinions are my own, to be sure. If I link to a product and say I like it -- I truly like it! Thanks for reading, following, and supporting Stephlin's Mountain.

From my mountaintop to yours!

Related Posts Plugin for WordPress, Blogger...